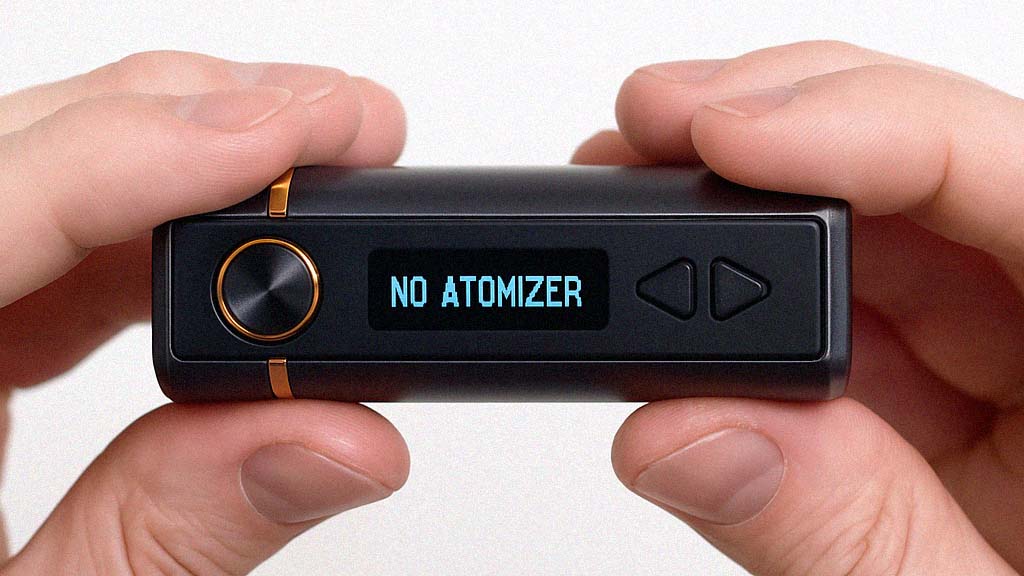
You’re ready to sit down and enjoy a session with your vape, and everything’s all set up and ready to go. You’ve just installed a new coil, and your tank is filled to the top. When you press your device’s fire button, though, nothing happens. You take a look at your vape mod’s screen to see what’s going on, and it’s displaying an error message: “Ohms Too High.” What’s going on here, and how do you fix an “Ohms Too High” error?
If your vape kit has a tank with a replaceable coil, it has the ability to check the resistance of the connected coil and confirm that the device is safe to operate. The coil’s resistance – which is measured in ohms – determines the level of power that will need to be drawn from the battery in order for the device to operate at the wattage you select. If the coil’s resistance would cause an unsafe battery draw, the device should display an error message and refuse to work.
Error messages like “Ohms Too High” and “Ohms Too Low” indicate that the coil’s resistance isn’t in the correct range for your device to operate. Although there are several different reasons why your vape mod might display one of these errors, it’s generally fairly easy to fix the problem through a simple process of elimination. In this guide, we’ll explain what you need to do. If your device isn’t damaged or defective, you should be able to get up and running very quickly.
Here's how to fix an “Ohms Too High” error on your vape mod.
Remove the Tank and Check for Leaked E-Liquid
Out of the many things that can cause your vape to display an “Ohms Too High” error, a leaking vape tank is the easiest one to fix. Simply remove the tank from your device and check to see if the threading is wet. Check the threading on your device and on the bottom of the tank. If the threading is wet or dirty, it may not be possible for your device to read the coil’s resistance accurately. If you find e-liquid in your device’s threading, dry it with a paper towel. If the threading is very dirty, you can clean it with a cotton swab. After you’ve ensured that your mod’s threading is clean and dry, reconnect the tank and try vaping again.
Disassemble and Reassemble the Tank
If your vape mod continues to display an “Ohms Too High” error, the next thing to do is confirm that your tank is properly assembled. If the coil isn’t fully seated – or if the tank’s components are cross-threaded, leading to misalignment of the tank – the components may not connect properly. That can prevent the device from reading the coil’s resistance accurately. To troubleshoot this issue, you’ll need to disassemble and reassemble your tank. Since the tank may already have e-liquid in it, you’ll also need to rinse and dry the tank to ensure that vape juice won’t get on your hands.
When you reassemble your tank, you’ll want to do so very carefully to ensure that all of the components – especially the coil – are threaded together fully and properly aligned. If the threads don’t turn smoothly when you screw the tank back together, the components are probably cross-threaded. Reverse the threads and try twisting them together again to make sure that they’re aligned properly.
If your tank has a push-in coil, there may be protrusions in the coil’s base that need to line up with indentations on the bottom of the tank. If those components aren’t properly aligned, it will be impossible to push the coil all the way in – which can lead to an error message like “Ohms Too High.” Check the coil carefully to ensure that it’s properly installed.
Install a New Coil
If your vape mod is still displaying an error message relating to the resistance of the coil after the tank has been disassembled and reassembled, it’s possible that the coil itself has an issue. Faulty vape coils are very rare because top vape manufacturers produce their products according to very strict standards to ensure that every item is exactly the same. Defects do occasionally happen, though, and installing a new coil will eliminate that as a possible cause of the “Ohms Too High” error. If the new coil works, you can throw the old coil away.
Investigate Possible Hardware Damage
If your vape mod continues to display an error message about the coil’s resistance even though you’ve followed all of the steps in this article, you’ll need to examine your device more closely to identify possible damage to the hardware. You’ll also want to confirm that the tank you’re trying to use is actually compatible with your device.
- Check your vape mod’s specifications in the instruction manual or online. Somewhere in the specifications, you should see the device’s minimum and maximum supported coil resistance. Next, check the resistance of the coil that you’re trying to use. You can usually find the resistance etched into the side of the coil. If you can’t find it there, you can get the resistance by looking it up online or by looking at the outside of the coil’s retail box. If the resistance of the coil is higher than the maximum resistance supported by your device, you’ll need to use a different tank or coil.
- If you know that your vape mod should support the resistance of the installed coil – and you’ve tried more than one coil with no luck – the next thing that you should do is try using a different tank. If the new tank works, then you know that the original tank has a problem. Try disassembling and reassembling the tank again. If it still doesn’t work, it’s possible that the tank’s components are permanently misaligned, perhaps because the tank has been dropped on a hard surface.
- If your vape mod continues to display an “Ohms Too High” error even with a completely different tank, then the mod must be the cause of the problem. If the device has never worked, it is likely faulty and should be returned to the vendor. If the device initially had no problems and has stopped working, it’s possible that it is damaged from being stopped on a hard surface or submerged in water. If your vape mod has been dropped in water, you may be able to fix it by putting it into a sealed plastic bag with desiccant packets for a couple of days. Otherwise, it’s likely that you will need to replace the device.
Build Your Coils Carefully if You’re Using a Rebuildable Atomizer
Are you building your own coils with a rebuildable atomizer? If so, you’ll need to build your coils carefully in order to avoid a mistake that could result in a short circuit or incorrect resistance reading. When you build coils from scratch, a resistance checker is the most important tool that you can own. Before you begin using any rebuildable atomizer, you should always check the coil’s resistance to confirm that it falls within the expected range. If the resistance is too high or low, you’ll need to build a new coil or adjust the existing coil until the resistance is correct.
Do you have a coil that’s giving you an “Ohms Too High” error even though you’ve checked the resistance and confirmed that it’s correct? In this case, it’s likely that your atomizer’s metal cap is touching the coil. It’s possible that the coil is too large or that you didn’t trim the leads sufficiently before placing the cap over the coil. If you adjust the coil and eliminate the metal-on-metal problem, your vape mod should be able to read the coil’s resistance correctly when the atomizer is fully assembled.
Persistent “Ohms Too High” Errors? Make Sure Your Device Is Authentic
If you continue to see persistent “Ohms Too High” errors after following all of the advice in this article – and you’re certain that your vape mod isn’t damaged from being dropped on a hard surface or submerged in water – it’s worth the effort to confirm that the device you’re using is authentic. There are millions of fake vapes on the market today, and popular brands like Innokin are heavily targeted by counterfeiters. A fake vape may look virtually the same as an authentic device, but it’s very unlikely that a fake device will have the same functionality as a real one. Moreover, fake vapes are much more likely to behave in unexpected ways and may produce random error messages that are difficult to resolve.
Here at Innokin, we’re doing our part to combat the proliferation of fake vapes and ensure that our users receive only authentic products. The box for every Innokin product has a sticker with a scratch-off verification code. You can visit our device authentication page and enter the code to confirm that your device isn’t counterfeit. If the code doesn’t pass the authenticity check, you should notify the seller and return the product to the point of purchase.
This article is also available in Français.
Hemok Wang
Hey! Hemok here, a vaping enthusiast with a passion for helping people quit smoking. My uncle was diagnosed with lung cancer a few years ago after smoking for more than 40 years. I do understand that quitting smoking isn't only a physical issue but also a mental one. It's just hard to go "cold turkey". I believe that vaping is one of the best solutions to make the switch only if you do it in the right way, and that's why I am here to share :)


